Today's task was to take a normal picture and turn it into a piece of low poly art. Low poly art is when the image is made up of large triangles that give the image a polygonal look. It gives images a very clean and simplistic look while still remaining stylized.
Step 1 : Get an image. The image can be of a person, animal, plant, just about anything can be used. For this task, I'll be using an image of Isaac Brock, lead vocalist of the indie rock band Modest Mouse.
 |
| "Whabever" - Isaac Brock, 2016 |
Step 2 : Open up the image in Adobe Illustrator.
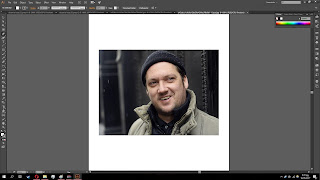 |
| Hello, Mr. Isaac. |
Step 3 : Once you've opened up the image, create a second layer. Then go to that second layer and click the Pen tool. You'll then want to pick a colour that sticks out from the image and leave the first colour box as transparent.
 |
| What your colours should look like. |
Step 4 : Once everything has been setup, begin drawing triangles on the face of your subject. You'll want to keep your triangles connected at all times, and make sure to end them before you start a new one. Every time you want to connect a triangle, make the sure the line is connected to the anchor point.
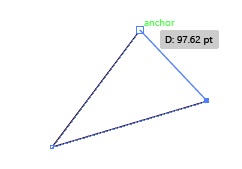 |
| See that anchor point? Always connect to the anchor, not the intersection. |
Make sure to take your time with this, as even the smallest mistake can ruin the image or consume tons of time. If you do everything properly, you should have something like this.
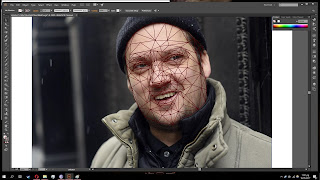 |
| Whoa Isaac, you feeling all right? |
If you're really feeling it, you can also go ahead and make their clothes polygons as well. It gives your image a very stylized look.
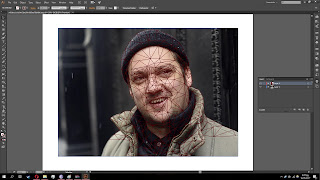 |
| If you're low on time, you can completely skip this |
Now, you can also check to see what your polygons look like by making the main layer invisible, though it's somewhat terrifying so be warned.
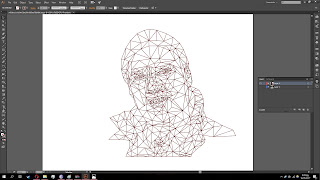 |
| "WELL" - Isaac Brock, 2009 |
Step 5 : Now that your polygons are done, you can start colouring them in. To do this, select the black arrow (you can either click on it or just press V) and select the polygon you want to colour. Once the polygon has been selected, use the eyedropper tool (again, either click it or press I) to pick a colour from the base image. If you've done everything right, you should end up with something like this.
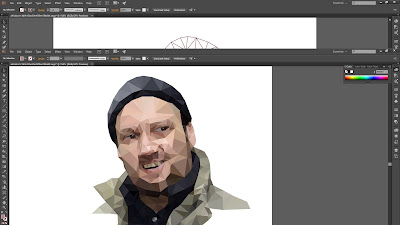 |
| Please, forgive the background work. Paint glitched out badly. |
Step 6 : While you're technically done, you'll definitely want to polish your work. You can add more triangles to your art, correct colors to fit proper shading or check for uncolored triangles. Once you're done with this step, your art should be complete.
And that's about it for low poly art. The main tips I have are to take your time and be precise. If you need, take some breaks while working on the image as prolonged exposure to a computer screen could hurt your eyes. Until next task then.


EmoticonEmoticon